The front tyre is due for replacement and this is the second time that Ive removed the front wheel myself. The last time it was on the previous tyre change in March 2012.
Only 14,000 kms since then which is about half of what I used to do in a year when I worked.
Ive also added a little extra in this process as my fork seals need doing and a little cleaning now might make it easier when the seals are done. Who knows I might even remove the forks myself and take them over to shop and save some of the labour charge.
Its a given that the bike is on the centre stand and that support under the motor is required. I used the car jack from my Territory last time but dad has recently donated a hydraulic jack so this came in handy.
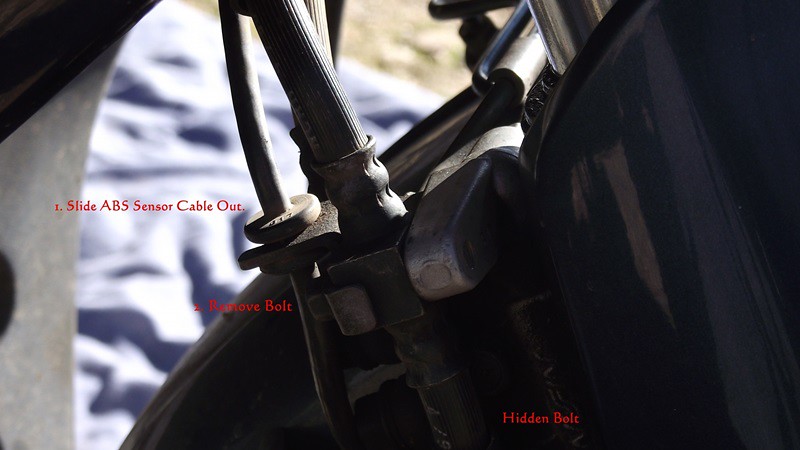
The manual suggests removing the items in the first picture which
doesnt need to be done unless you wish to remove the rear fender piece. Theres a bolt that needs to be removed and the brake line may get damaged if not moved out the way.
 2013_0702Front-Tyre-Change0006
 by
Alan, on Flickr
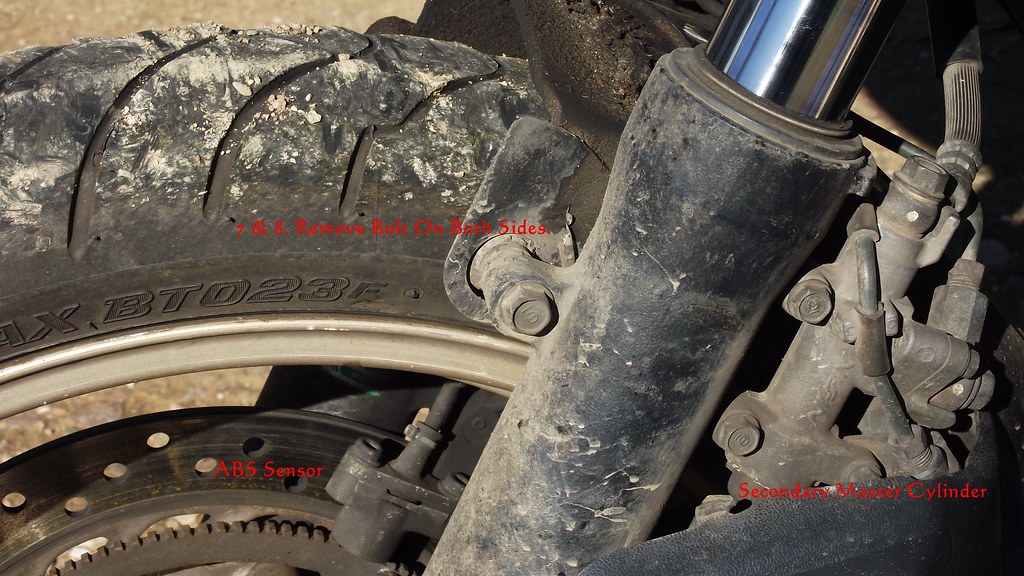
Theres four bolts that need to be removed so that the front half of the fender can be removed. Steps 3 & 4 in the photo show the location for the easier ones.
 2013_0702Front-Tyre-Change0007
 by
Alan, on Flickr
Next photo shows the bolts on top of the fender and between the forks (5 & 6) which need to be removed and then the front piece should just about fall out.
 2013_0702Front-Tyre-Change0008
 by
Alan, on Flickr
Since I was also cleaning things up around here the metal bracket needed to come as well and theres a bolt 7 & 8 on each side. Two other bolts have to come out as well, the top mounting bolt on the secondary master cylinder and the one on the other side that is usually hidden by the brake line (Hidden Bolt In First Photo). The impression I get from the manual is that it fender plate comes out fairly easily but it didnt while the wheel was in place.
This step only needed if you are removing the rear fender or removing the forks.
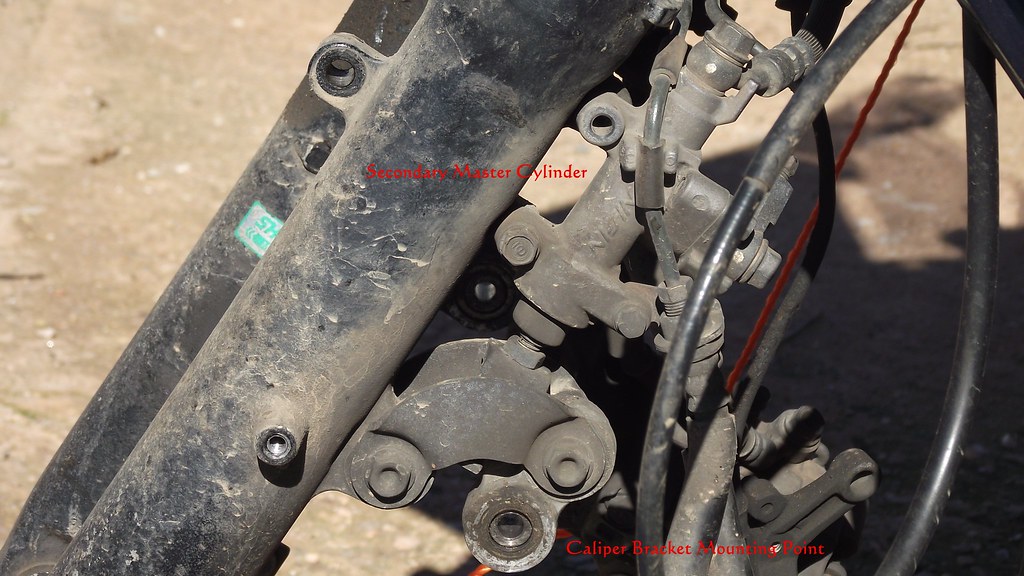
The ABS sensor pictured is removed a little later and you can also see the secondary master cylinder (right of picture) for the linked brakes now that the cover has been moved.
 2013_0702Front-Tyre-Change0010
 by
Alan, on Flickr
The manual doesnt mention anything about removing the LH calliper in regards to removing the wheel but with the bike on the ground I think it may be easier if the calliper is moved. Also with cleaning the forks its better if the pads are well out the way. There's two bolts to remove before the calliper can be removed.
 2013_0702Front-Tyre-Change0011
 by
Alan, on Flickr
For those that dont have ABS the calliper mounting bracket is designed to pivot on the lower point and the top locates on the secondary master cylinders push rod. Any braking on the front wheel (by hand or foot) causes the calliper to move and operate the brakes on the rear disc (outer two pots on the calliper). You should be able to lock the rear wheel when pushing the calliper forward by hand. (But thats another post).
The photo of the master cylinder is for information only and its the first time Ive seen how it works.
 2013_0702Front-Tyre-Change0017
 by
Alan, on Flickr
We now move around to the RH side where we need to remove another three bolts so that the RH calliper can be removed.
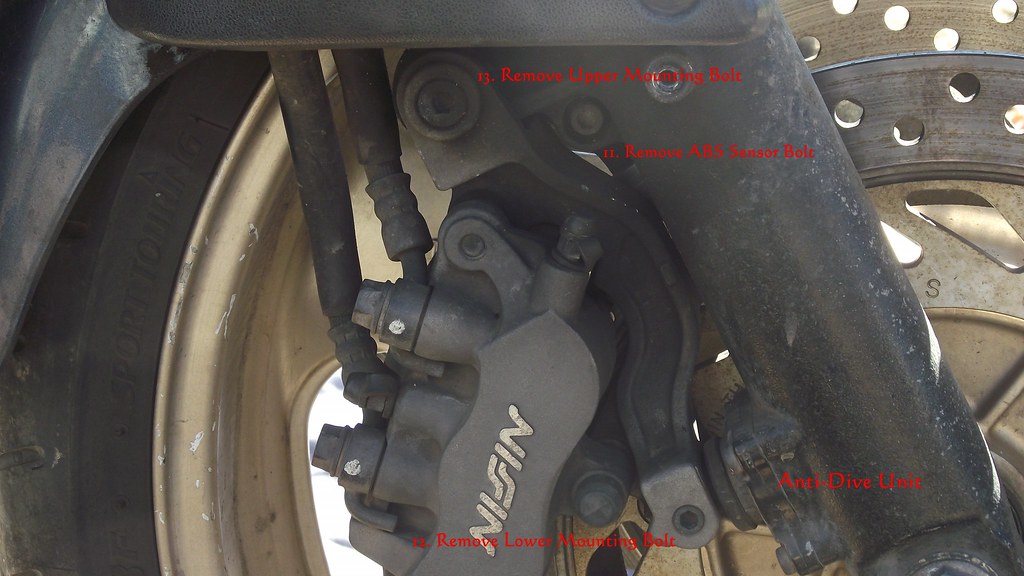
The first time I tried to take the wheel off I noticed that the ABS sensor had to be removed. Its not mentioned in the manual (other than dont damage it) but with the bike on the ground and limited space to move the wheel its better for the sensor to come out so that comes out next (11) followed the lower bolt (12) attaching the bracket to the anti-dive system. The upper bolt (13) and the brake can be removed.
 2013_0702Front-Tyre-Change0015
 by
Alan, on Flickr
Its also a good idea to get some rope e.g. and attach it to each calliper and tie it off somewhere (I used the bars) to take the weight off the brake lines. Oh and dont forget the speedo drive cable (14) while youre at it.
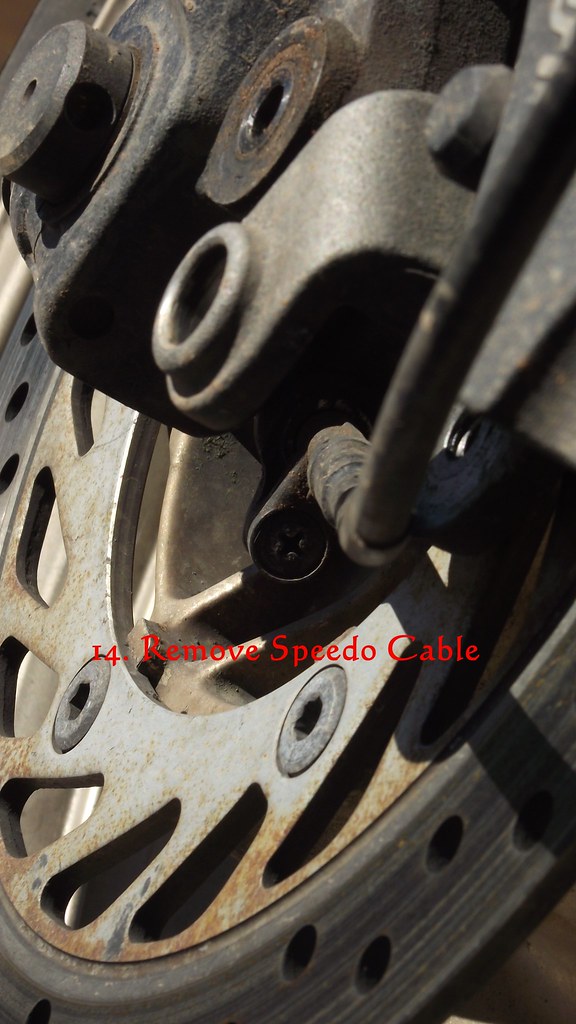 2013_0702Front-Tyre-Change0016
 by
Alan, on Flickr
And make sure to check the brake pads for wear. Mine are now half worn so new pads are on the list for replacement no later than the next tyre change.
Loosening the 4 axle pinch bolts, removing the axle, speedo drive and spacer is pretty well straight forward so no pretty picture.
The rear fender and the fender plate came out a lot easier after the wheel had been removed.
All the offending dirt and grime thats built up has all been removed with some very hot water, washing powder (good for taking the grease of your hands as well) and a scrubbing brush.
Putting it all back together is just mainly reversing the process.


