Author Topic: 465 Progressive Shock Install  (Read 6211 times)

Offline alans1100

  • 1999 ST1100A
  • UNBELIEVABLE "5000 Posts" Member
  • ****
  • Posts: 6250
  • Thanked: 1161 times
  • Alan, Peterborough, SA
465 Progressive Shock Install
« on: July 24, 2013, 05:40:56 PM »
Some one in the weather forecast place got it right for a change. It was the first sunny day in over a week, so I moved the bike around to the back yard and replaced the rear shock.

The RH side case, the seat and the RH side cover all need to come off before you can start. A jack is needed (hydraulic in my case) to support the drive unit and take the load off the shock while working on the bolts.

The manual says to remove the upper and then the lower bolt but I found it prudent to loosen both before doing so. I had no trouble removing either bolt after being in place for 14 years but I did spray some WD40 on them before starting.

When the old shock was out I could see that the oil had indeed leaked past the seal causing the spring to work on its own.

Next up was the greasing up of bolts etc and locating the new shock in position. Top bolt was fairly easy but the bottom wasn’t. So out with the shock to see what was happening. Progressive supply two washers and the one nearest the wheel must have slipped a little stopping the bolt from going into the thread. A little extra grease to hold the washer in place helped and the lower bolt went in. Put the top bolt in and tightened both up.

I measured the free sag before I removed the old shock (just for comparison) and it came to 14.25 inches and the new one was 14.5 I increased the pre-load up about 3 turns and tightened up the lock ring. As advised by the instructions I set the dampener to no. 3 as a starting point.  The OEM pre-load adjustment tool is still usable on this shock and I used the one supplied and the OEM one both together to tighten the lock ring.

Next I sat on the bike and Heather measured 13.5 inches which is about where it should be and then I went for a ride around the block. The bike seemed ok but I rarely ride solo these days so I got Heather on the bike and we went for a little ride around town.

The state of our roads aren’t the best but I found the worst of the bumps and a couple rail tracks which is a good test for the rebound which Heather gave the thumbs up for.

On Thursday we have to go to Port Augusta to see Heather’s sister so It’ll be a good road test being a 250km return trip. I will need to fine tune the adjustment and only by riding will I know by how much since it's all trial and error but so far so good.

Old OEM shock compared to the Progressive one

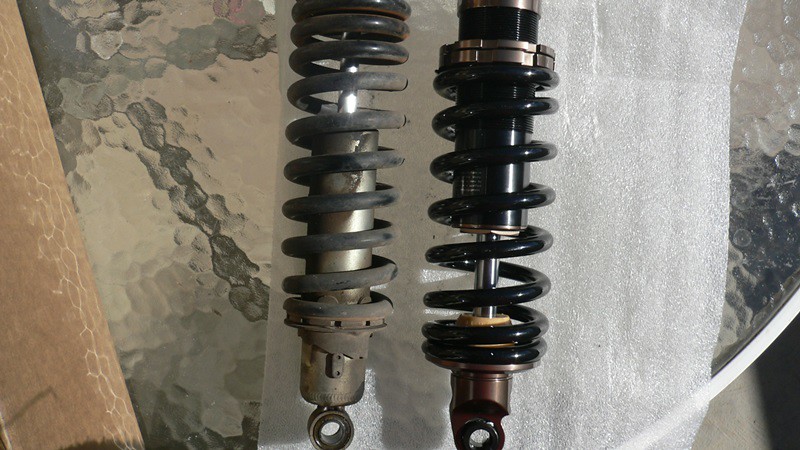
2013_0724Progressive-Shock0004 by Alan, on Flickr

Pretty grimy in there

2013_0724Progressive-Shock0005 by Alan, on Flickr

The old rear shock is out

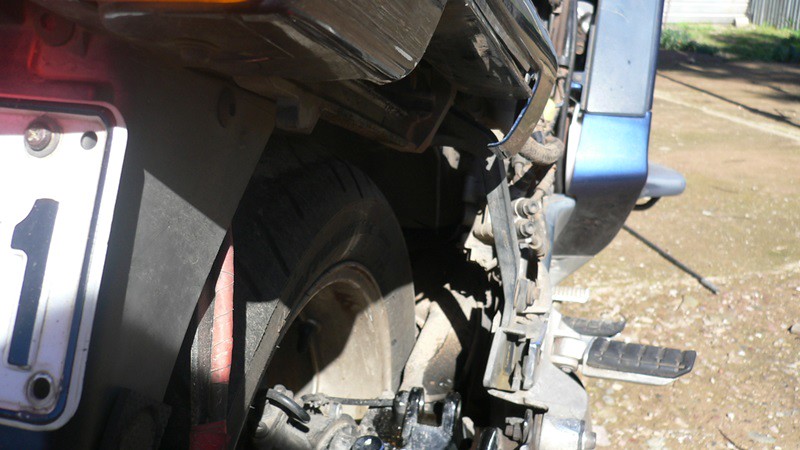
2013_0724Progressive-Shock0006 by Alan, on Flickr

From the RH side

2013_0724Progressive-Shock0009 by Alan, on Flickr

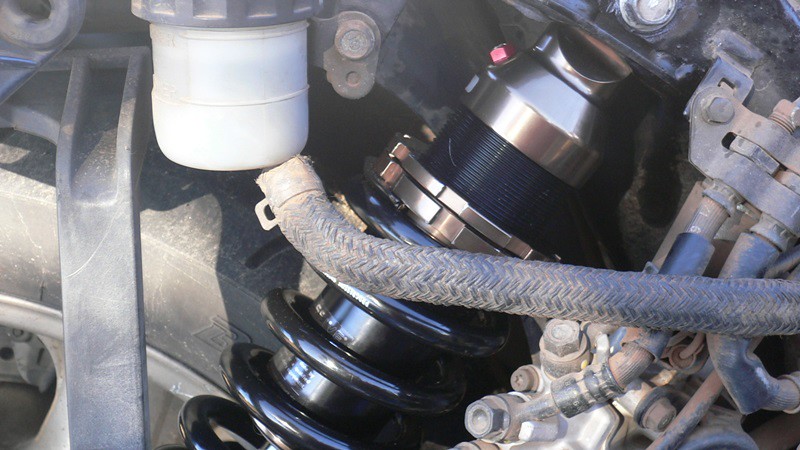
The new shock in place

2013_0724Progressive-Shock0011 by Alan, on Flickr

View from the rear

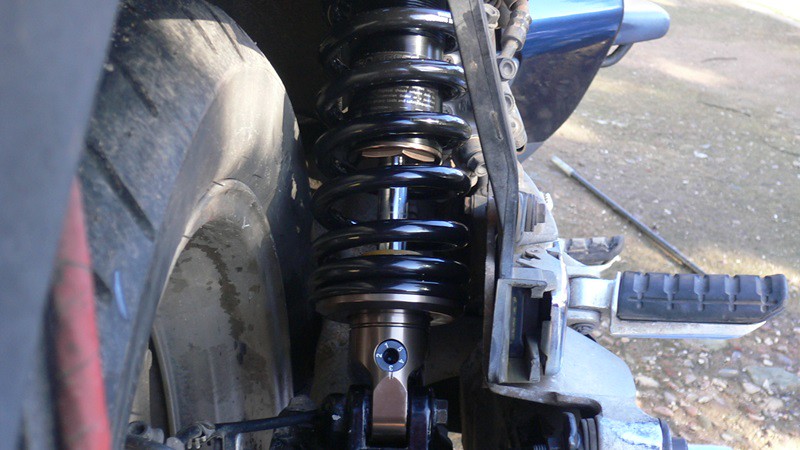
2013_0724Progressive-Shock0012 by Alan, on Flickr

Looking in from the top

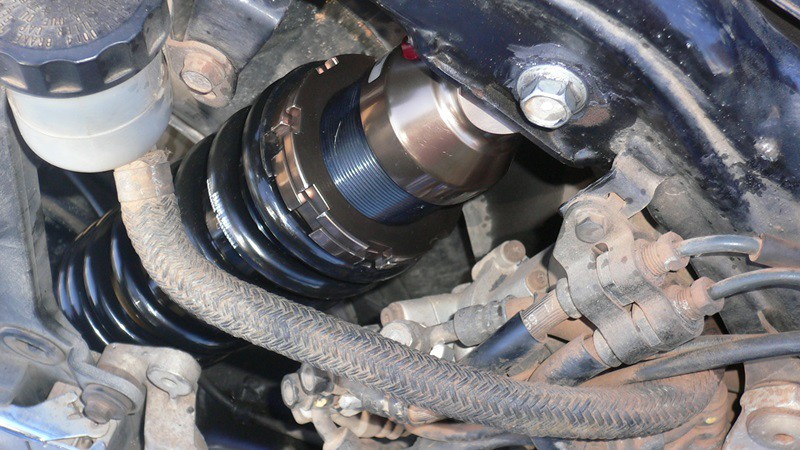
2013_0724Progressive-Shock0013 by Alan, on Flickr

There's ample room to adjust the pre-load on my ABS model as the ABS modulator isn't as large as the coolant tank on the base model.

2013_0724Progressive-Shock0014 by Alan, on Flickr
« Last Edit: February 22, 2018, 10:53:09 AM by alans1100 »
1999 :bl11  2004 :13Candy

FarRider #921- BR15, BR17, CR1


Offline saaz

  • Supreme "2000" Club Member
  • *****
  • Posts: 4542
  • Thanked: 41 times
  • Canberra ACT
Re: 465 Progressive Shock Install
« Reply #1 on: July 24, 2013, 06:02:53 PM »
Looks like a nice shock.  I just checked my top shock bolt while replacing a CB cable (as the top bolt had broken in half), and found the top bolt loose yet again, out a cm or a bit less. I used loctite on it and that did not work (I replaced it 15,000kms/3 months ago).  I have taped over the bolt head as a temporary fix but I think I will safety wire the bolt before going on the Border Run.  Why it keeps on working its way out I don't know but it has to stop  :cuss
John
(Ridden on and forever in our hearts)
1996 Honda ST1100P
2014 Triumph Trophy SE
Ozstoc, STOC #7239, Farrider #461 Ulysses #061681, IBA #59143 and some others
 

Offline Biggles

  • NatRally 2018 - Mackay
  • "Top Dog" 10000 club
  • *
  • Posts: 14051
  • Thanked: 2501 times
  • Bridgeman Downs, Brisbane
Re: 465 Progressive Shock Install
« Reply #2 on: July 24, 2013, 06:55:41 PM »
Very good description.  With pix!
Sounds a lot easier than the ST1300's shock replacement.
For the modern man who lives in the city, riding a bike might be one of the only ways to escape the humdrum monotony. To take off and ride. To be both at one with nature and one with the bike. To feel masculine. Adam Piggott

OzSTOC #16  STOC #6135  FarR #509  IBA #54927
 

Offline Brock

  • Tardis Tech
  • UNBELIEVABLE "5000 Posts" Member
  • ****
  • Posts: 8721
  • Thanked: 1695 times
  • White is the fastest
Re: 465 Progressive Shock Install
« Reply #3 on: July 24, 2013, 07:09:58 PM »
What grade of loctite did you use Saaz, 240 should stop it, 290 will for sure. Perhaps use a nyloc nut ..
Brock
Asian Correspondent
2003 Honda ST1100PY


Ulysses #32829
STOC #8239
OzSToc # ??
Kinross WA
 

Offline saaz

  • Supreme "2000" Club Member
  • *****
  • Posts: 4542
  • Thanked: 41 times
  • Canberra ACT
Re: 465 Progressive Shock Install
« Reply #4 on: July 24, 2013, 07:33:05 PM »
I used the grade I had at the time, which has worked ok in other uses. May try a higher grade.  Nyloc nut won't work, although a bendable tab on a washer might do the trick.  Safety wiring is something I have done before and really solves the problem.

What grade of loctite did you use Saaz, 240 should stop it, 290 will for sure. Perhaps use a nyloc nut ..
John
(Ridden on and forever in our hearts)
1996 Honda ST1100P
2014 Triumph Trophy SE
Ozstoc, STOC #7239, Farrider #461 Ulysses #061681, IBA #59143 and some others
 

Offline Biggles

  • NatRally 2018 - Mackay
  • "Top Dog" 10000 club
  • *
  • Posts: 14051
  • Thanked: 2501 times
  • Bridgeman Downs, Brisbane
Re: 465 Progressive Shock Install
« Reply #5 on: July 24, 2013, 08:36:09 PM »
I used the grade I had at the time, which has worked ok in other uses. May try a higher grade.  Nyloc nut won't work, although a bendable tab on a washer might do the trick.  Safety wiring is something I have done before and really solves the problem.

OK if you've got a drilled nut and an anchor hole.  I guess you can make those holes yourself, although I wouldn't like drilling a hole in most nuts.  The bent tab washer would be simplest.
You do want to be able to undo it one day, so some Loctite varieties might be an over-kill.
For the modern man who lives in the city, riding a bike might be one of the only ways to escape the humdrum monotony. To take off and ride. To be both at one with nature and one with the bike. To feel masculine. Adam Piggott

OzSTOC #16  STOC #6135  FarR #509  IBA #54927
 

Offline saaz

  • Supreme "2000" Club Member
  • *****
  • Posts: 4542
  • Thanked: 41 times
  • Canberra ACT
Re: 465 Progressive Shock Install
« Reply #6 on: July 24, 2013, 09:22:52 PM »
Years ago someone I knew decided to use the loctite for pressing gears onto gear shafts for gearboxes. Unfortunately he used it on the drain plug for the rear drive of his XS1100.  So we had to tip the bike up to drain the oil out of the drive, which was easier than trying to force the drain plug.  So I am wary of going in too hard with the loctite.  A simple tab washer will do the trick, and I just happen to have saved many over the years.

I used the grade I had at the time, which has worked ok in other uses. May try a higher grade.  Nyloc nut won't work, although a bendable tab on a washer might do the trick.  Safety wiring is something I have done before and really solves the problem.

OK if you've got a drilled nut and an anchor hole.  I guess you can make those holes yourself, although I wouldn't like drilling a hole in most nuts.  The bent tab washer would be simplest.
You do want to be able to undo it one day, so some Loctite varieties might be an over-kill.
John
(Ridden on and forever in our hearts)
1996 Honda ST1100P
2014 Triumph Trophy SE
Ozstoc, STOC #7239, Farrider #461 Ulysses #061681, IBA #59143 and some others
 

Offline Gavo

  • Double STowner no longer only an 04 ST 1300A
  • Legendary Member
  • *****
  • Posts: 986
  • Thanked: 51 times
  • Hoddys Well Toodyay WA
Re: 465 Progressive Shock Install
« Reply #7 on: July 24, 2013, 10:22:01 PM »
Note

Remember NOT to use locktite on sump plug Landcruiser    :rofl
Rob
Undercover HVAC Tech
All round nice guy so i believe
Also have now been told !

"We are all in it together"  Harry Tuttle.

STOC #8508
FR#601 
                  
:blu13
 

Offline alans1100

  • 1999 ST1100A
  • UNBELIEVABLE "5000 Posts" Member
  • ****
  • Posts: 6250
  • Thanked: 1161 times
  • Alan, Peterborough, SA
Re: 465 Progressive Shock Install
« Reply #8 on: July 25, 2013, 08:10:38 PM »
We went for a 250km round trip ride to Port Augusta today to go and see Heather's sister.

The first few kms after leaving town the rear end of the bike felt a little strange. Quite possibly the tyre getting used having a good shock. No complaints from Heather this time and no bottoming out on the shock either but then it's not the worst road we travel on. All good for now.
1999 :bl11  2004 :13Candy

FarRider #921- BR15, BR17, CR1


Offline Greencan

  • Legendary Member
  • *****
  • Posts: 650
  • Thanked: 118 times
  • ST Legend
Re: 465 Progressive Shock Install
« Reply #9 on: September 21, 2013, 03:35:29 PM »
Arvo All...

Alan tis been a few weeks since you popped this rear on...just wondering what your thoughts are know.

Cheers the can:-)
 

Offline alans1100

  • 1999 ST1100A
  • UNBELIEVABLE "5000 Posts" Member
  • ****
  • Posts: 6250
  • Thanked: 1161 times
  • Alan, Peterborough, SA
Re: 465 Progressive Shock Install
« Reply #10 on: September 21, 2013, 10:55:29 PM »

Alan tis been a few weeks since you popped this rear on...just wondering what your thoughts are know.


Well, I think we're both happy with the new shock. It feels about the same as the OEM shock when we first got the bike seven years ago.

When I installed it I turned the pre-load about two full turns from where the factory set it and set the dampening on 3 (out of 5) and for two up riding it seems about right. I have yet to tow the trailer but I doubt if there would be any difference to the handling.

After doing about 480kms today on varied sealed conditions at the state limit plus a few rough road work sections I am completely happy as there was no bottoming out at all.
 
1999 :bl11  2004 :13Candy

FarRider #921- BR15, BR17, CR1


Offline Greencan

  • Legendary Member
  • *****
  • Posts: 650
  • Thanked: 118 times
  • ST Legend
Re: 465 Progressive Shock Install
« Reply #11 on: September 22, 2013, 08:20:21 PM »
Ta for that...

Quote
I turned the pre-load about two full turns from where the factory set it

...were those turns to increase or decrease the load? Not that it probably matters that much anyway,  2-up or otherwise...am interested to hear your thoughts on its damping. That is, are those abrupt road bumps firmly dealt with with this cushion?

How is it with hi-speed damping? Very firm, firm, average, soft, or "I didn't feel it"?

And by hi-speed, I mean the cushion speed not your fwd speed. EG hitting a wee 30 - 50mm pot hole which is about 300mm wide at 20kph.

Any thoughts appreciated.

Ta, Dick :-)


Offline alans1100

  • 1999 ST1100A
  • UNBELIEVABLE "5000 Posts" Member
  • ****
  • Posts: 6250
  • Thanked: 1161 times
  • Alan, Peterborough, SA
Re: 465 Progressive Shock Install
« Reply #12 on: September 22, 2013, 09:22:43 PM »
That was to  increase the pre-load. More of a guess for two up riding. The new shock seemed to have been factory set for one rider as the sag height measurement between the  Progressive and the OEM (set for one rider) were with a mm of each other. Seemed ok, so I left it at that.

As for pot holes.......we get a couple after a decent rain shower on our side of the rail line crossing but I avoid them on the bike so as yet not tested.

But we do have a couple of  lows at the end of a couple bridges where the rear shock would top out and give Heather a bit of a jolt. Those two bridges are now a piece of cake. The nearest  hardly anything is felt and the second one you can feel but firm not severe like it was before. It might have something to do with a bikes short wheel base as in the car it's not noticed.

Of course taking into account that any new shock would be better than my old rear shock which was totally useless and just relying on the spring.

The setting of three seems average for two up and firm for when on my own.

One thing to consider is that by the look (picture 1st post) of the spring coil winding the Progressive one seems to be a linear one and the OEM seems to be s a progressive spring.

Hope that helps.


1999 :bl11  2004 :13Candy

FarRider #921- BR15, BR17, CR1