For a few years I've put up with the fuel warning light night working though I knew what the issue was and how to fix it I kept putting it off. Earlier this year I bit the bullet and ordered the part (37810-MN5-008) and an aftermarket air cleaner from David Silver Spares. I also needed the tank gasket (1754-MN5-000) which I ordered from the dealer in Port Augusta.
I also read through this
http://www.st-riders.net/index.php?topic=976.0 which lead me to the part number though I didn't do what they did in replacing the sender.
This morning I got around to doing it.
1. Remove the seat
2. Clean off and dirt/dust etc. that might have accumulated around the fuel pump area over the years.
3. The next two photos say it all but watch our for fuel spill from the filter
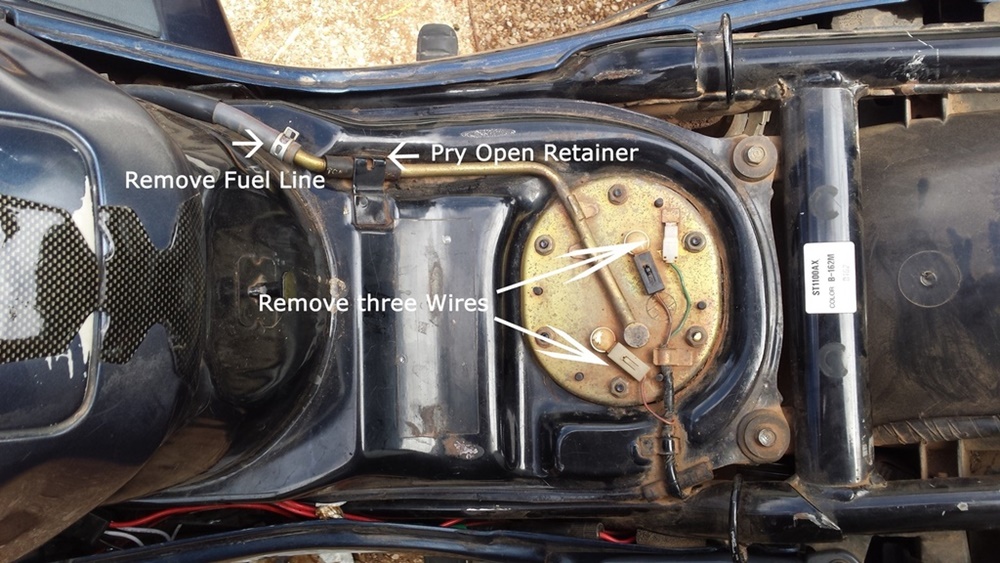

4. Move the wires out of the way; I used the helmet holder.
5. No photos for this part - Slowly lift pump unit above tank - not easy so just be firm but gentle as there is fuel return hose inside the tank (has a white ring on in the picture below)that that needs to be pulled off its location - by hand. Once that is done the whole low will come out with a little bit of twisting and turning. I used a clean rag to put over the tank to keep anything that might want to drop in their.

You will loose some fuel from the pump when that's removed and turned to get to the sensor. I studied this part before I attempted this and it looked like a straight swap - and putting the new sensor side by side with the old one they were apart from the length of the wire. I didn't measure it but I guessed about 25-30 mm difference with new part having the shorter wire.
That difference in wire length was no doubt the reason for the solder job in the ST Riders link. Rather than put the wire where it should go as seen in the above picture I went the direct route and secured the wire. My soldering skills aren't that good and the way it's now is ok, no strain on the wire at all.
6. Replacing the gasket - only one way I could see was to take it along the length of the pump arm and over the pump and reverse the process for putting the new one on.
7. Putting the pump back in the tank was far easier than taking it out except for when it came to putting that hose back on. I located it by hand but I could push it on so out with pliers from the bike tool kit, gripped the hose and it went on. Not much room available but just enough.
8. Then it's just a matter off replacing all the nuts , wires and fuel line.
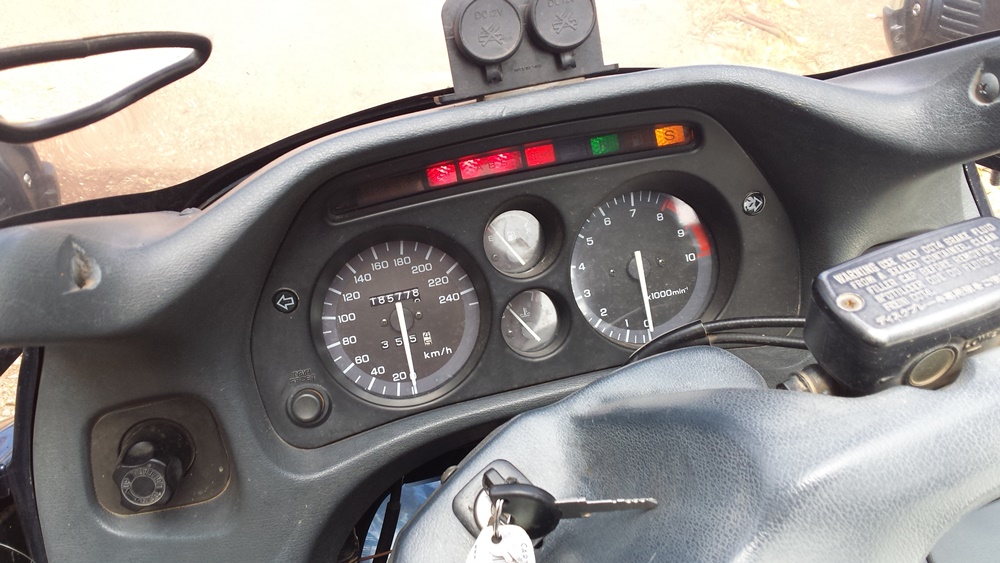
When I turned the key on I could here the pump turn over until the fuel started to pump. The bike started and kept running so I must have done something right. The low fuel light was still on so either I stuffed up or the fuel was low. Turned the bike off, got the phone and took a few pics.
Turned key on and the usual warning lights come on and go off The two red lights to the left are the ABS/TCS waning lights and they don't go off until just after the bike moves off; test function and if all is ok they go out
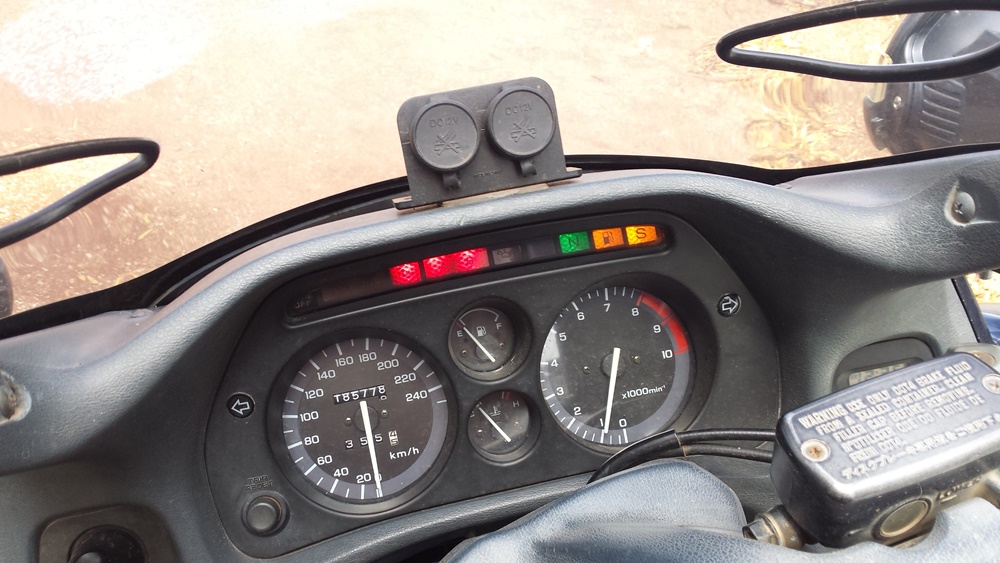
After starting again the low fuel warning lights up which was expected as the fuel level indicated between the red and white level on the gauge.
Coming back from Adelaide on the first towing the trailer and another trip to Jamestown on Monday left the fuel level low enough for the fix. We're of to Port Pirie tomorrow to collect the new dash shelf and some shopping so down to get the fuel this afternoon; down that low it should take about 24/25 litres.


