This was my Easter 2014 Project;Items Needed Coping Saw with large arch
Masking Tape
Medium and light grade sandpaper
Newspaper
White and Black High Gloss plastic spray paint
Pencil
Pop rivets and gun
Plastic clothes pegs X 16
Small Screwdriver
Metal washers x 8
Auto door bump protectors
Hot Air gun
WD40
Thin cardboard 5 x 5cm square
Gloves
Acetone
White thermoset plastic
o 2 - 10 x 300mm strips
o 2 - 10 x 200mm strips
o 1 - 5 x 5cm square
20mm Hinges
Rat tail File
Short barrel cam lock
Safety Glasses
Hot Glue gun and glue sticks
Bench grinder
Dremel Tool or similar
Professional quality Superglue
Drill and bits
ST1100 Police pod
Patience and about 24hrs
Credits Mr Plastics - 5/20 Herbert St, Slacks Creek QLD 4127 - 3290 6188 (Plastic and Superglue)
Bunnings Hardware (Hinges, WD40, Cam lock and pop rivets)
Autobarn (Spraypaint and Auto door protector strips)
SafetyNote a number of items mentioned in this How-To-Guide can cause serious injury if the appropriate precautions or safety measures are not followed. You should be familiar with all items mentioned before attempting this procedure.
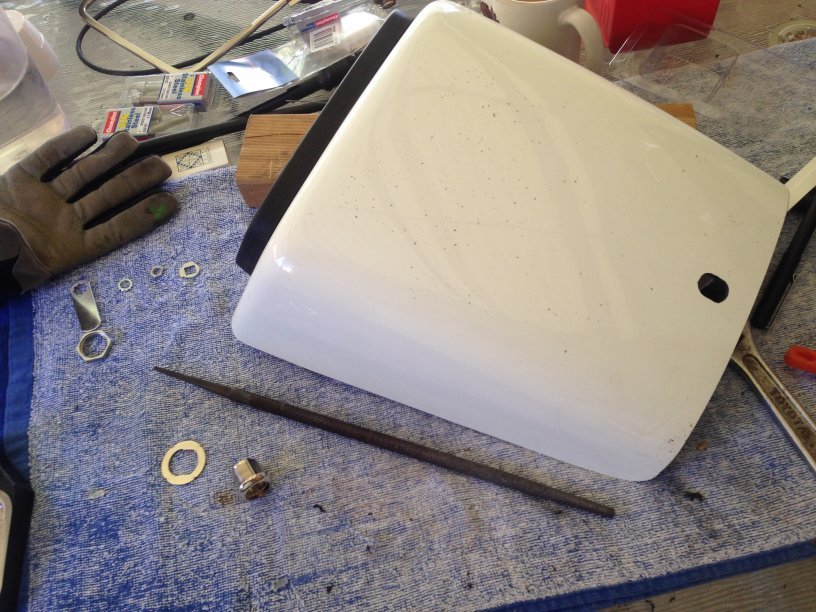
BackgroundImage 1 shows the ST1100 pod used to house the radio and other electrical gear on the Police model. To access the pod you need to remove the solo and then remove 6 bolts, 4 of which hold the rear gantry in place, not very convenient at all.
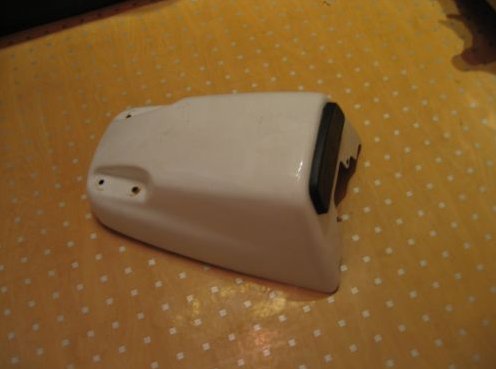 Image 2
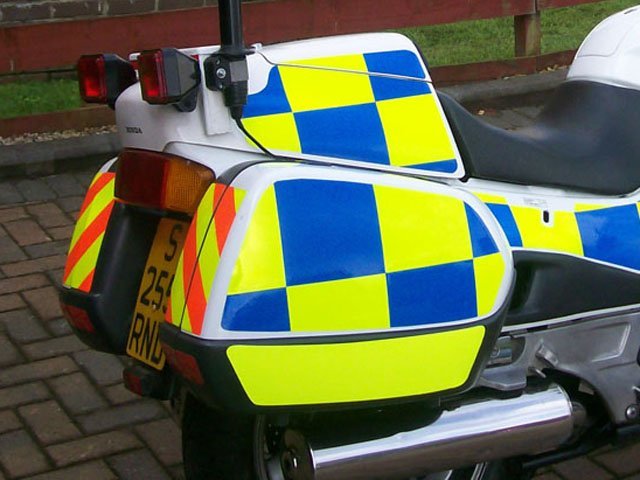
 shows a UK spec Police ST1100 where someone has modified the standard pod to open from above without removing the seat or messing around for an hour undoing bolts. This was the aim of the exercise to take my standard pod and convert it into something the same as or better that the UK image.
 Procedure:1)
 Read through these entire instructions before commencing to familiarise yourself with the processes.
2) Take your pod and place masking tape on the areas where you intend to make the cuts.
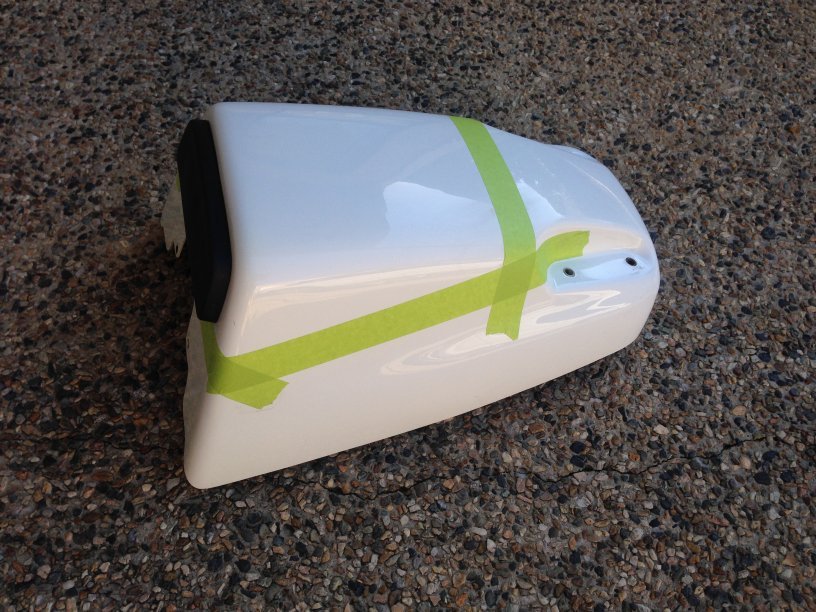
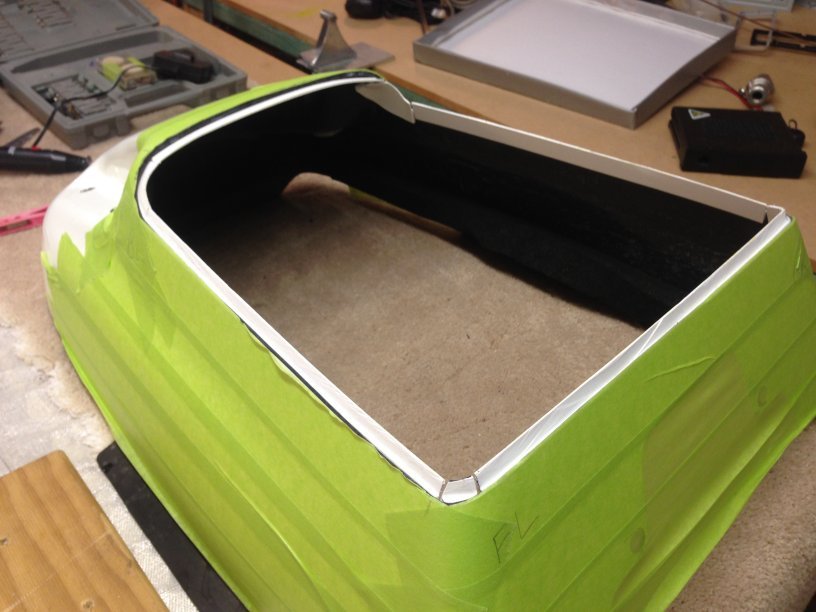
Image 3. Look through images of Police bike and other converted pods to see how you would like the pod to look when completed. My advice is to use the pattern I chose as it is practical, provides excellent access to the whole of the interior of the pod, is reasonable easy to create and looks smashing! The line at the front is 75mm below the backrest.
 3)
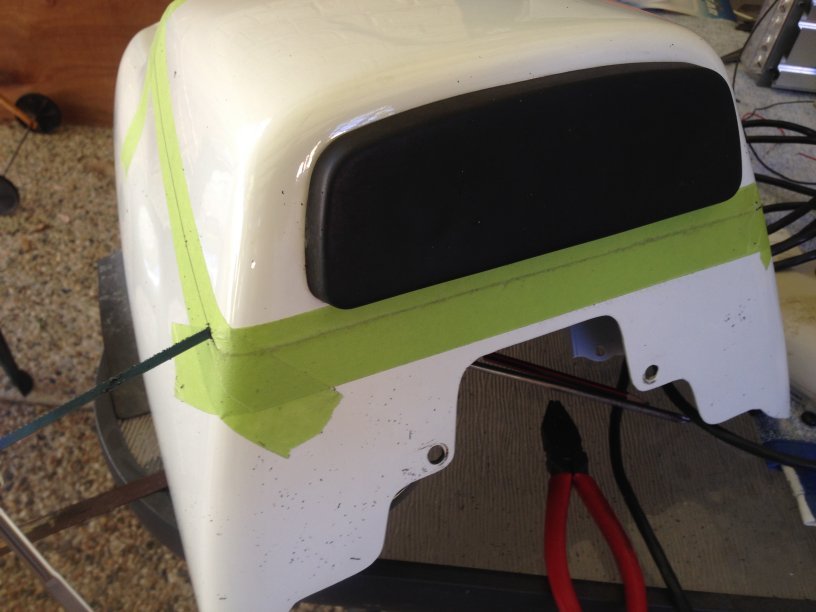
3) Draw your lines making sure they are symmetrical. Use a round object to draw the corners. Avoid right angles.
Images 4 & 5 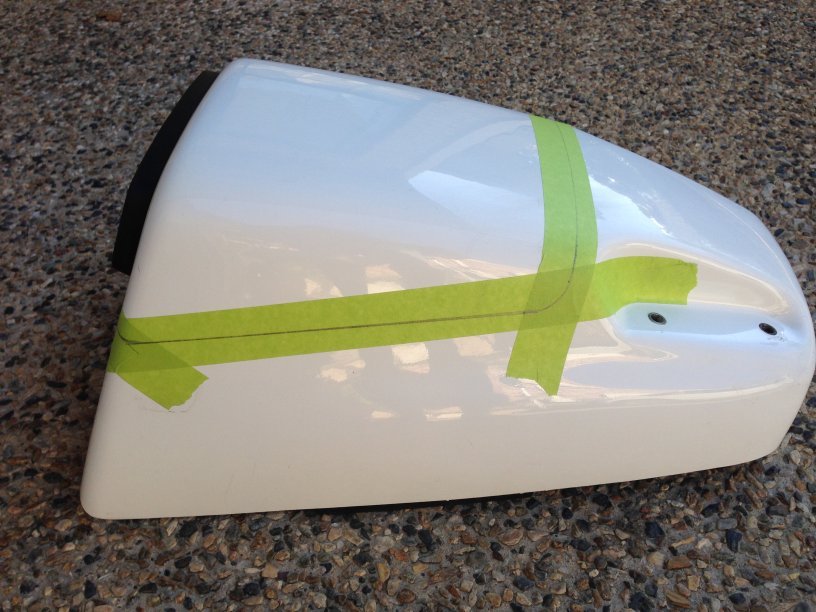
 4)
4) Using the coping saw and starting at the front left corner start cutting along the line. After you have cut about 10mm you should be able to remove the saw blade and pushing on the top and bottom either side of the cut create sufficient space to insert the blade. Reconnect the body of the saw and continue.
Image 6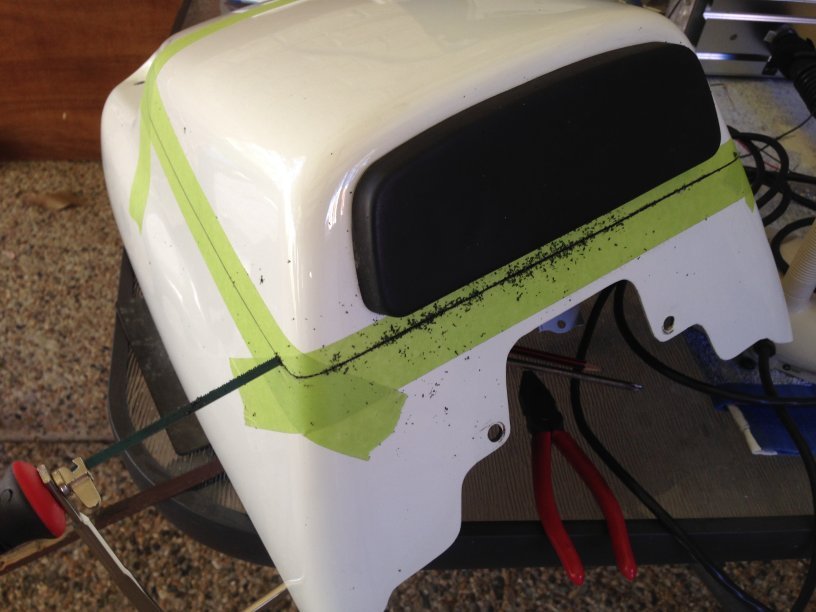 5)
5) Continue cutting until the whole of one side is complete then retape over your cut to maintain the structural integrity of the pod until finished.
Image 7. Retape each side as you go. Note the top section of the pod is nearly twice as thick as the sides. Go really slow around the two back corners to get the curve 100% accurate.
 6)
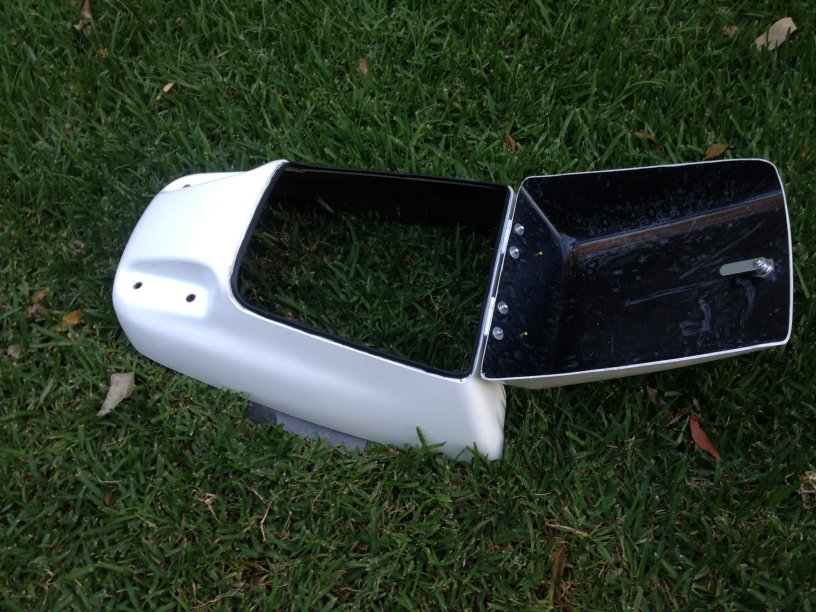
6) You should now have two complete pieces (the lid and the body). Lightly sand the cut edges on the lid and body to remove the plastic tailings.
Image 8.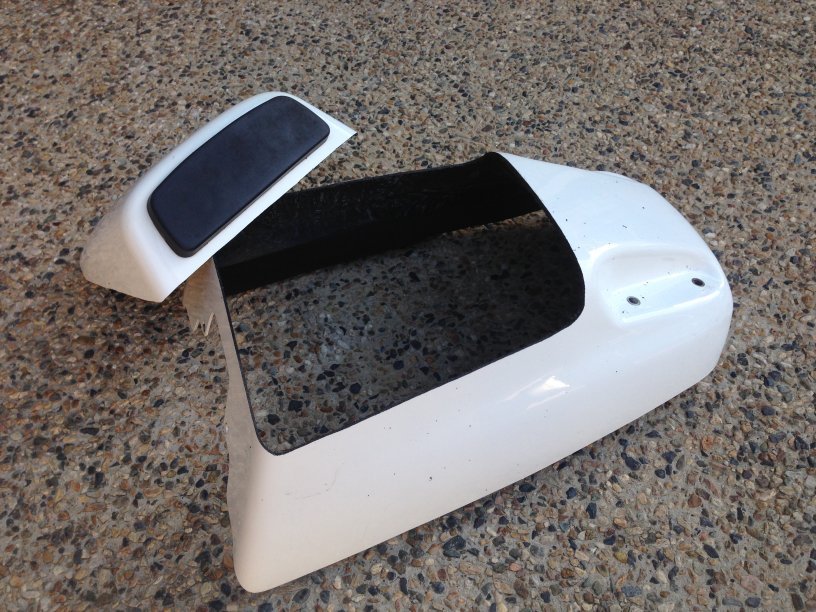 7)
7) Take the plastic strips (which can be cut with a bench saw by the supplier)
Image 9 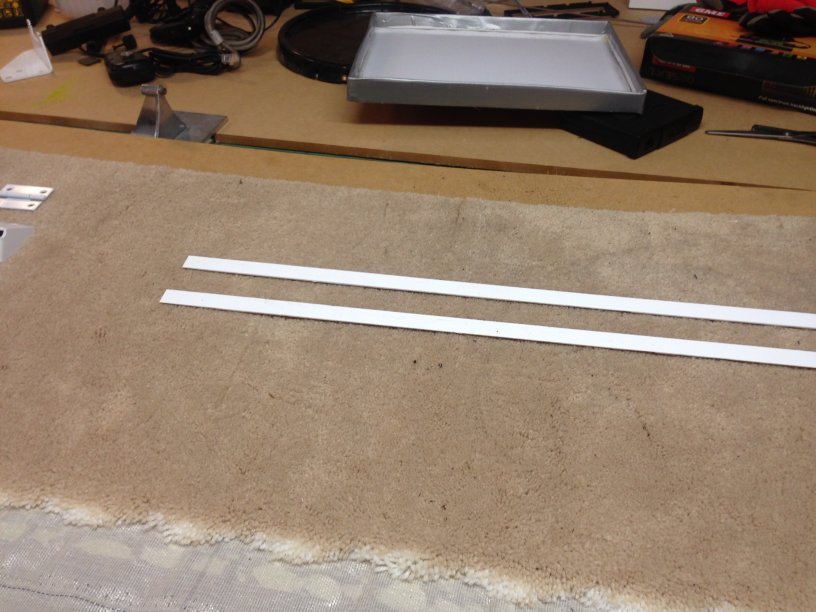
and cut away half the thickness from the top half for the entire length.
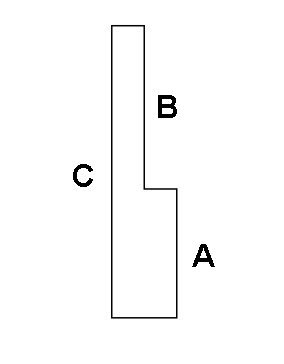
Image 10. The side view of these strips should now look like
Image 11. 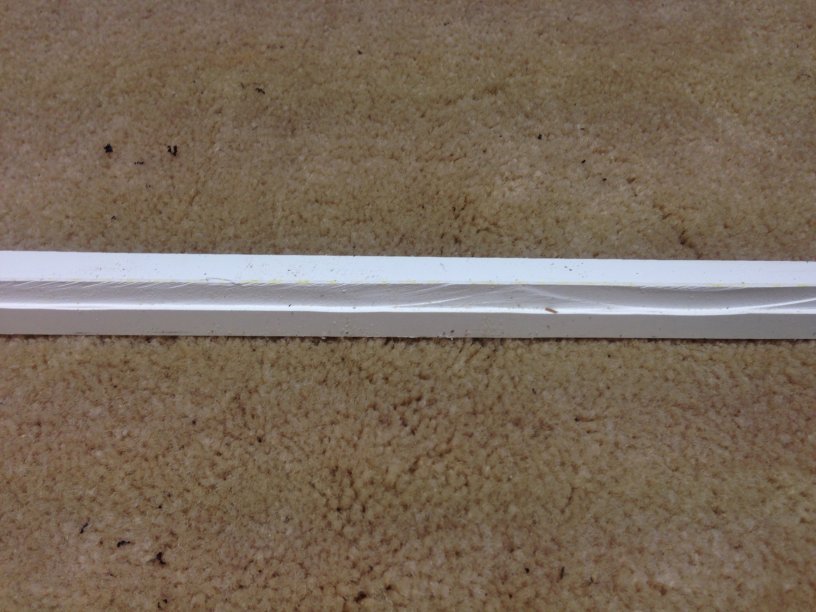
There are a number of ways to achieve this;
a. The supplier has them as stock
b. You or the supplier does a fine cut with a bench saw
c. You grind it away with a bench grinder
d. You grind it away with a dremel tool
e. I had a bench saw at my disposal, so I chose option b.
The number after 7. Take some medium sandpaper and sand approximately 15mm from the top edge of the body on the inside, all around.
Image 12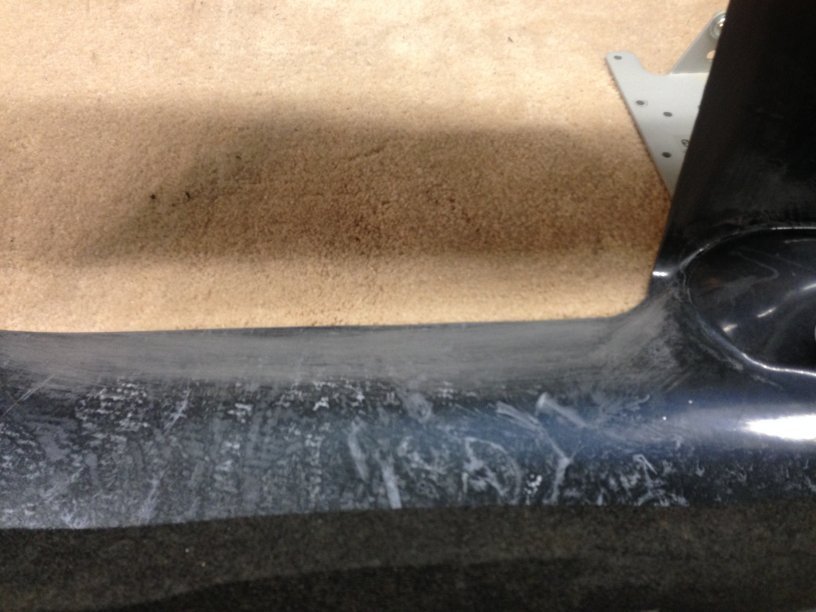 9)
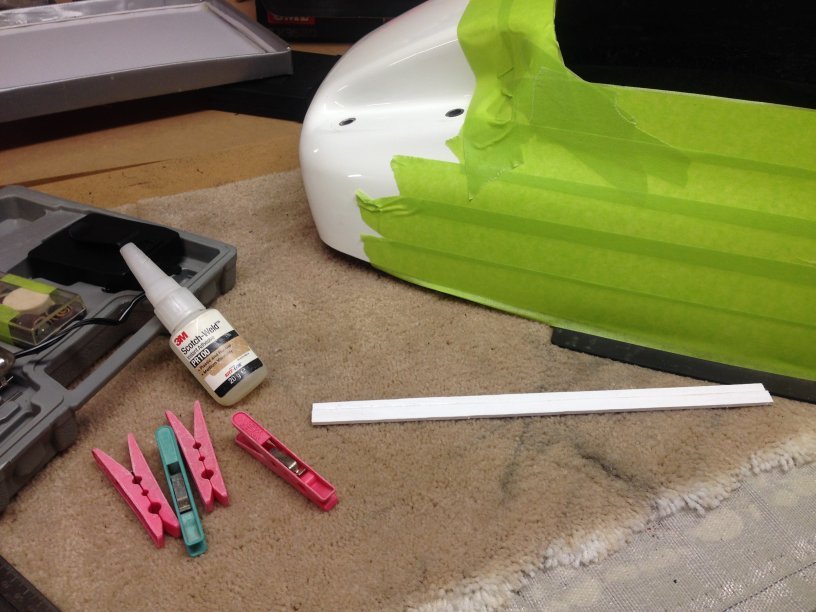
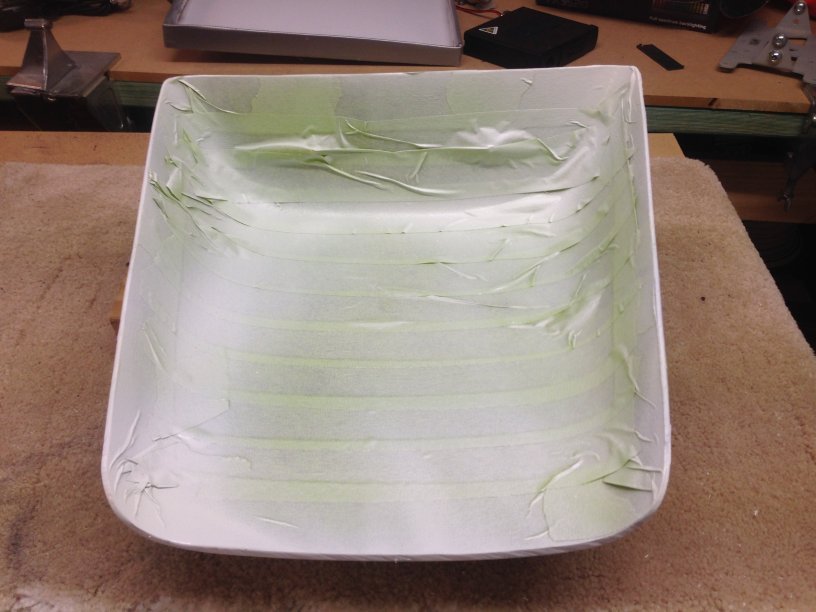
9) Mask up the body to prevent getting any Superglue on the outside paint as it will cause the paint to blister, even a small amount.
Image 13.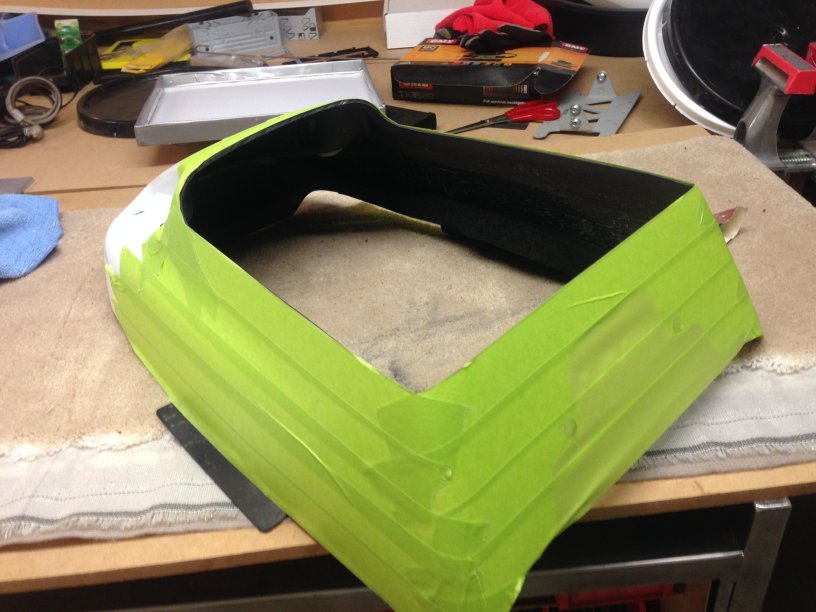 10)
10) Using the pencil mark each corner with a number or letters by writing on the masking tape eg (RF = Right Front)
11) Cut each plastic strip, one for each straight section to the correct length. Longest strips for the sides. Place a pencil mark on the masking tape at the start of each strip to realign later. You will find that the straight section for the end of the body (furthest away from the seat) is slightly cured upwards. Note this is the only piece that is not vertical but horizontal. Using gloves and the hot air gun heat this particular strip until it is bendable then remove the heat source and hold in place on the body so that this strip takes on the same curve. The plastic normally returns to a hard, fixed state within a few minutes. Finally taking the 4 strips and the medium sandpaper, sand sides
A and
C until there is no shiny plastic coating visible.
Image 11. You are now ready to glue the
straight pieces on to the body.
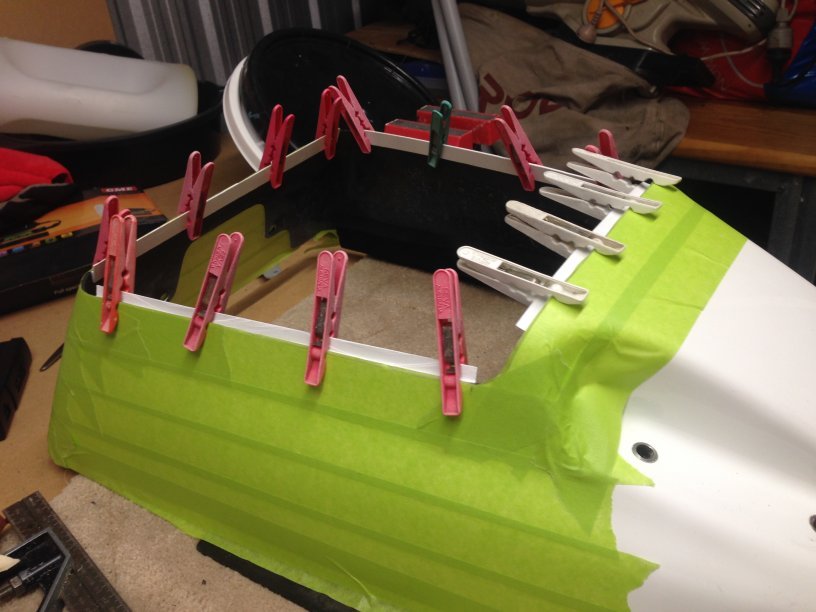
12) Using the Superglue and the pegs, apply super glue to side
A of the first strip and position on the body (utilising alignment mark you made in
step 10) with the top of A aligning with the top edge of the body.
Image 14. The inside of the strip should be
C.
 13)
13) Repeat the same process for the other three sides.
Image 15. Leave for 1/2hr to completely set and then remove pegs.
 14)
14) Using the thin cardboard push this into the space in the first corner and draw out the outline of the piece that is required to join one straight section to the next. As these are potentially weak points due to their lack of surface area in contact with the body and corners take the most stress, they need to be deeper that the standard strips, ie 15mm instead of 10mm
Image 16. Write the corresponding number on the cardboard that designates the corner as per
step 9).
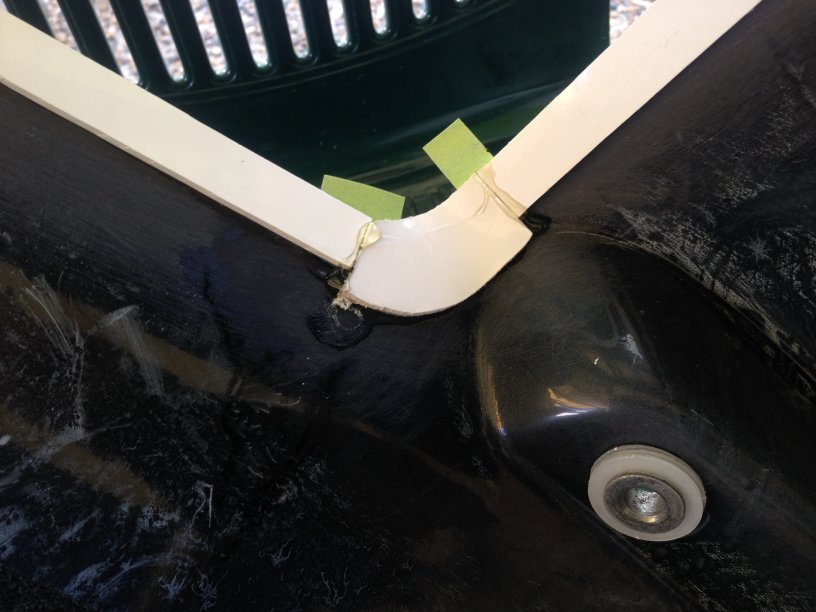 15)
15) Now repeat
step 13) for all the other corners. You should now have 4 pieces of cardboard. Using these as templates, trace them onto the plastic square. Cut out all the shapes using the coping saw.
Image 17. 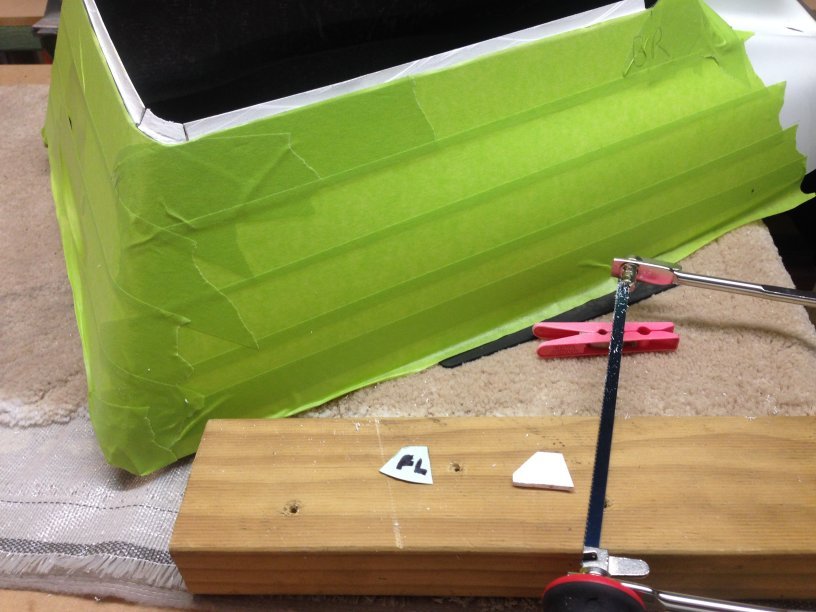 16)
16) Using the hot air gun and gloves heat one of these corners at a time. The plastic will need to be hotter than in
step 10) as you want this to fit to the bodies contour as well as aligning with the straight pieces. Dont worry if you dont get this right the first time as it takes practice. If in doubt rather than trying to heat up the same piece time and time again cut a new piece. Once you have one corner to the desired shape dont be tempted to do the next. By the way, a small gap at either end of the straight pieces is preferred and normally happens as you shape the plastic corner.
17) Take your newly created and cooled corner and replace it into the corner it is designed for. Using the pencil draw a line on the plastic corresponding to the lip of the body. We are going to grind this area to half its thickness, the same as the straight pieces. Using the grinder carefully grind away half the thickness of the plastic. Again dont worry if you stuff this up, just repeat
Steps 16) and 17) until you get it right. All my corners took at least two attempts each.
When finished and you are happy with the result glue into place. Remember to sand all the surfaces first.
Image 18.18) Repeat
steps 16) and 17) for the remaining corners.
Image 19. Leave to set for half an hour.
 19)
19) Once you have finish all four corners place a small amount of masking tape over the corner gaps. We now need to make it watertight.
Image 20. 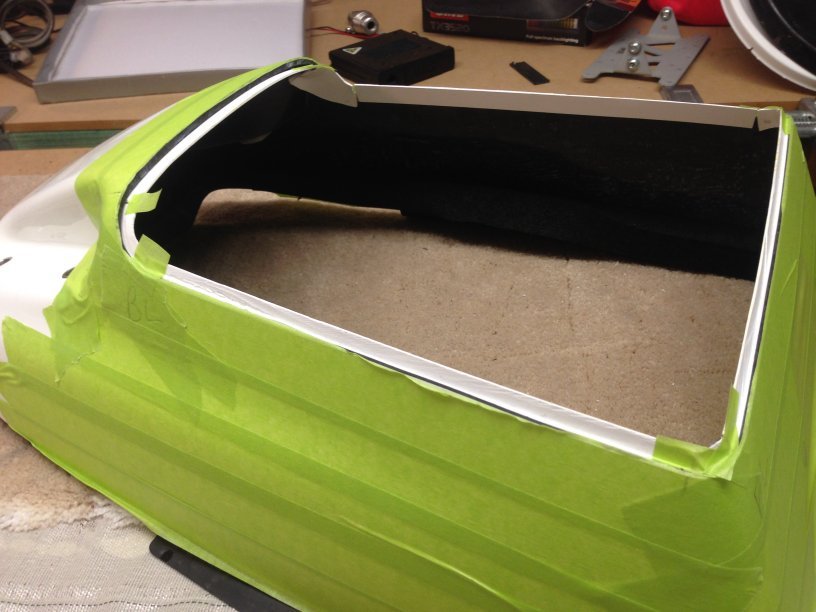 20)
20) Turn the body over and using the hot glue gun squirt hot glue into every crack you can see. I prefer using hot glue as its easy to clean up and flows into all the small cracks.
Image 21. Once the glue is dry remove the excess from your strips and corners.
21) The cut edges from
Step 6) on the body and the lid will be black in contrast to the pods high gloss white.
Mask up both the body and the lid (inside and outside) and spray the cut surfaces with the High Gloss white paint. Let dry. Repeat until you are satisfied with the result.
Images 22 and 23.
 22)
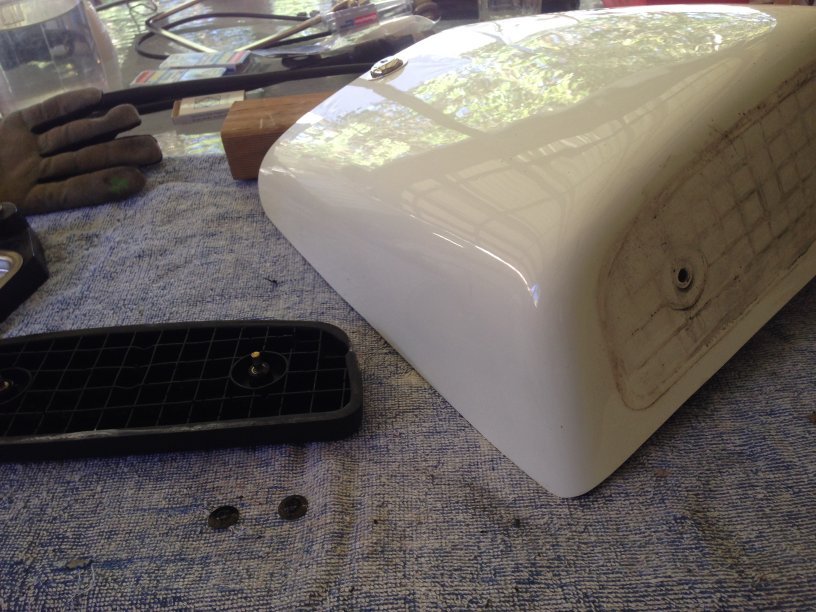
22) We are now going to install the lock in the lid. Read the instructions that came with the lock. It will mention not using the barbed ring ignore this and using the bench grinder carefully remove all the barbs.
Apply masking tape to the outside area of lid where the lock will be installed. Find the middle rear of the lid. Mark a point approximately 30mm in and drill a 2mm pilot hole with your drill (slowest speed). Follow this up with a 10mm drill bit. Most of these cam locks are designed for a 19mm hole however I recommend that you start with a 10mm maximum. Now take that debarbed ring and place it over the drilled hole and using the pencil, trace the interior shape onto the masking tape. Note this will not be round but racetrack shaped. Then using this as a guide and the rat tail file, file away the plastic until the lock fits neatly into the hole.
Image 24.
 23)
23) Install the lock and check its operation. Use the debarbed ring (it looks better).
Image 25. 24)
24) Installing the hinges. I recommend using larger heavy duty single hinges (2) rather than the more flimsy piano hinges. In order to use this type of hinge the small backrest needs to be removed.
Turn the lid over. Spray the poles protruding into the lid from the back rest with WD40. Using a small screwdriver gently prise the small circular retaining rings off the poles.
Images 26 and 27. 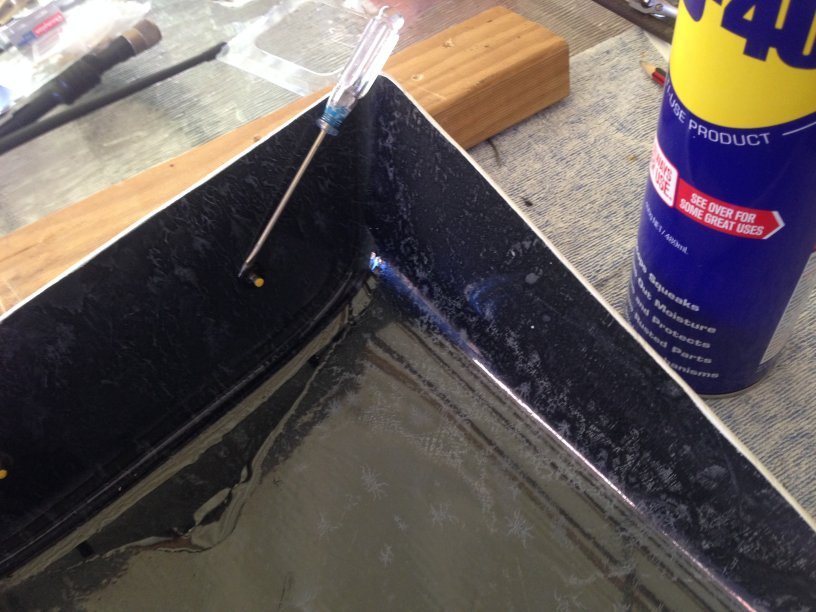
 25)
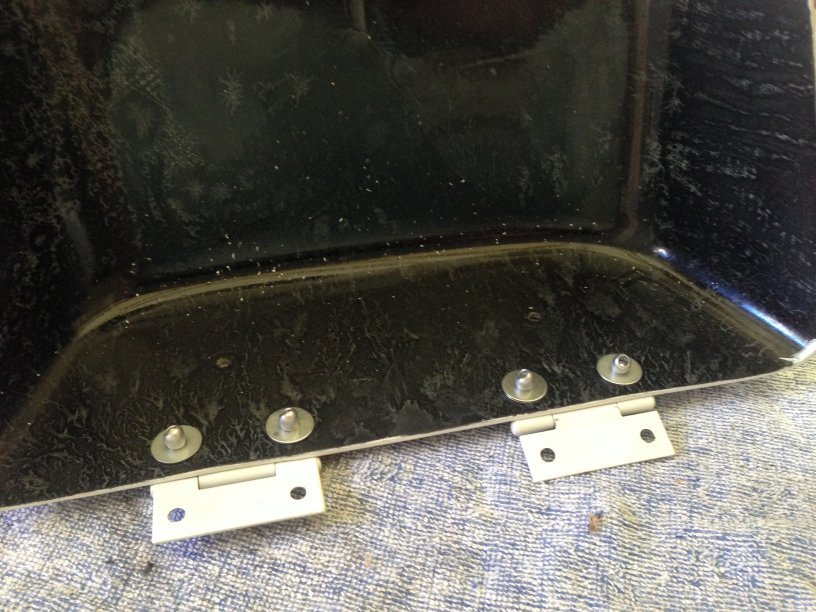
25) Clean the underside of where the backrest sits. Position the hinges mid way between the holes made by the poles and drill holes that match the pop rivet size. I recommend that the pop rivets, the washers and the hinge holes are identical in size (this may require drilling out the hinge holes slightly)
26) Pop rivet the hinges to the lid using the washers on the inside to provide additional strength. Make sure the washers are firmly up against the plastic.
Images 28 and 29.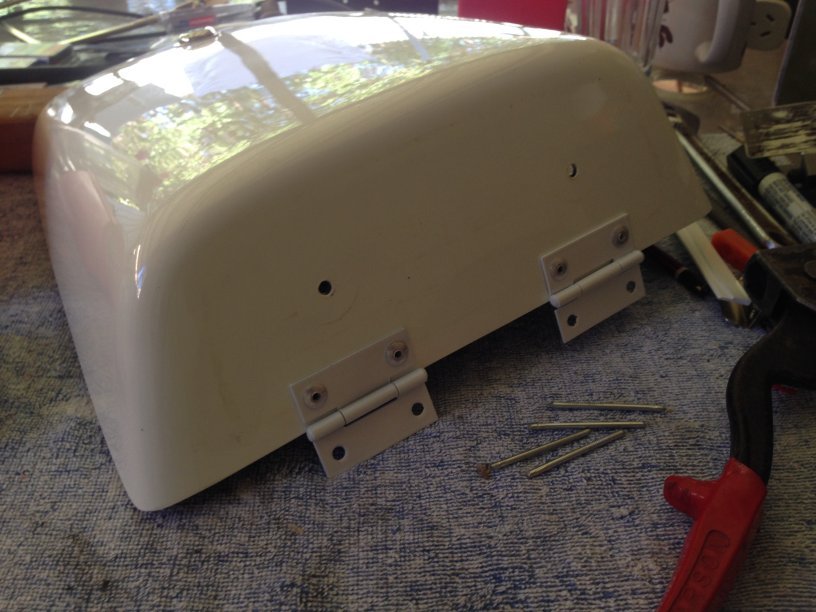
 27)
27) Replace the backrest over the hinges and reapply the retaining rings to the poles.
Image 30.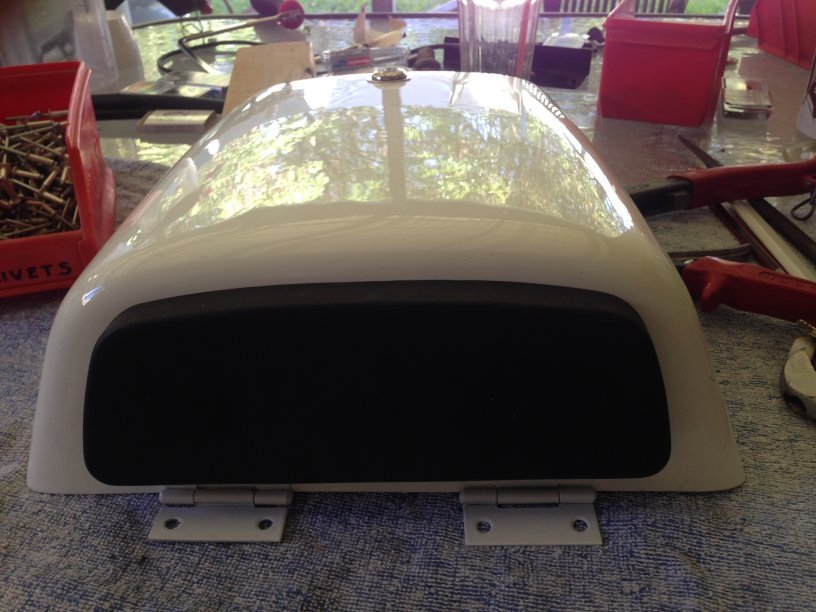 28)
28) We are now going to make the lid tight on the body and prevent water entering. Using the door protector strips and hot glue apply the strips (round side outermost) to the lip of your strips and corners. Position any joins symmetrically taking into account the areas on greatest water collection ie best on the sides.
Images 31 and 32.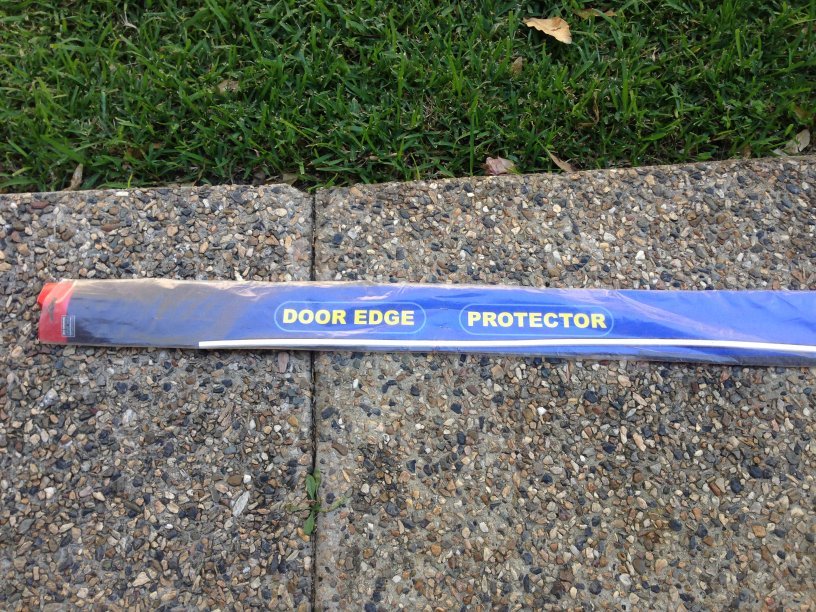
 29)
29) Place the lid on the body and check alignment. Once happy, mark, drill and pop rivet the lid to the body, remembering the washers on the inside.
30) Now to get that tight fit on the lock. Rather than use the metal bracket that came with the lock, use some of your white plastic left over scraps to melt and fold unit it is slightly higher that the cam lock arm. Then working out the direction the cam lock arm swings and the bench grinder, sand away, on an angle the upper surface. This way the lock will tighten the more it turns.
Image 33.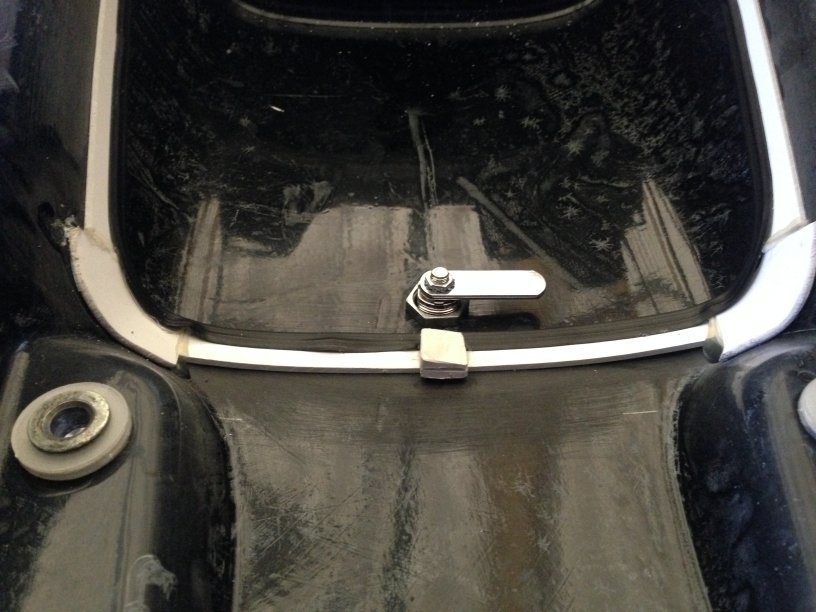 31)
31) Nearly there now. Take the pod and mask up all the items in the inside you dont want painted. Dont forget to mask up the white edges and replace any form that might be required.
Spray the inside of the pod with high gloss paint. Leave to dry.
Image 34.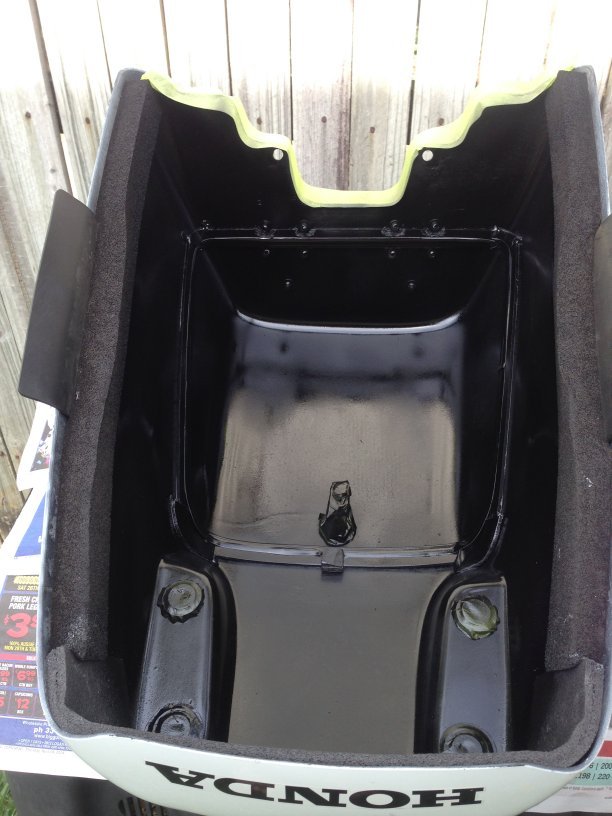
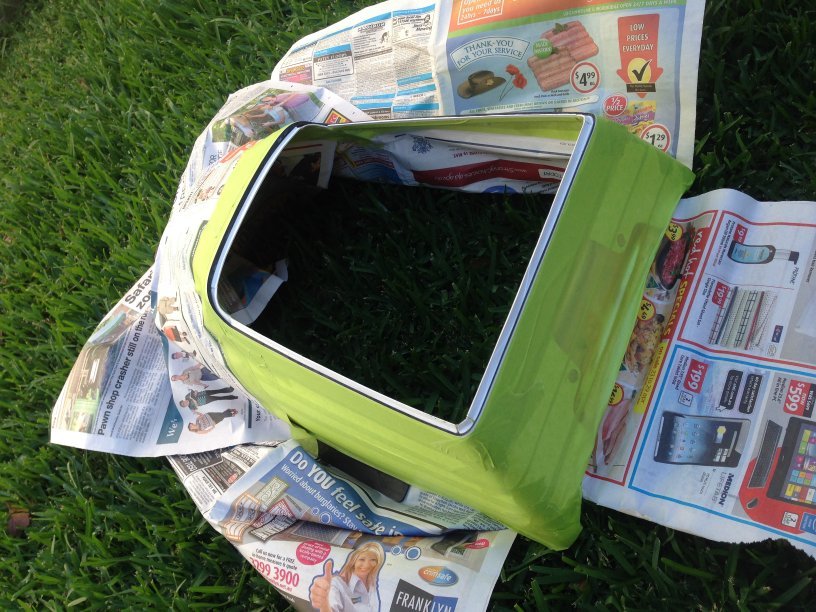
COMPLETED
[/size]

Oh, and if you are wondering why the acetone was on the list and we never used it? Well I kind of glued my index finger to the body and spent 20 minutes contemplating how I would go with 3mm of the tip of my first finger sliced off. Trust me, have the acetone available.
Any comments or further advice PM me regards,
Adrian.


