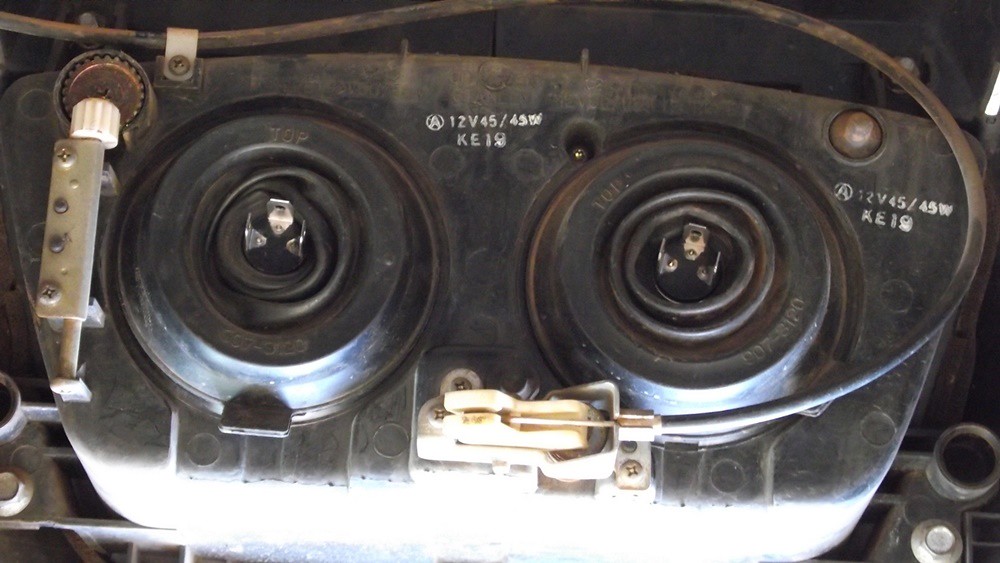
My 1100 is off the road at the moment so while all it's plastic ( the front half at least) spead all over my back yard it made sense to get a couple photos of behind the headlight and hopefully get to see what we are actually trying to feel our way through during the headlight globe change over.
Also be wary if it appears that both headlights have failed at the same time. Yes, it happens but it's very rare. If this happens, check that your starter switch hasn't stuck halfway as the lights are turned off during start and come back on when you release the starter (1300 as well).
If the start cycle is ok, check your fuses (1300 as well).
This applies to both 1100 versions but more so the ABS version as there is no access (or very little) from the top by removing the screen due to the extra ABS components behind the fairing.
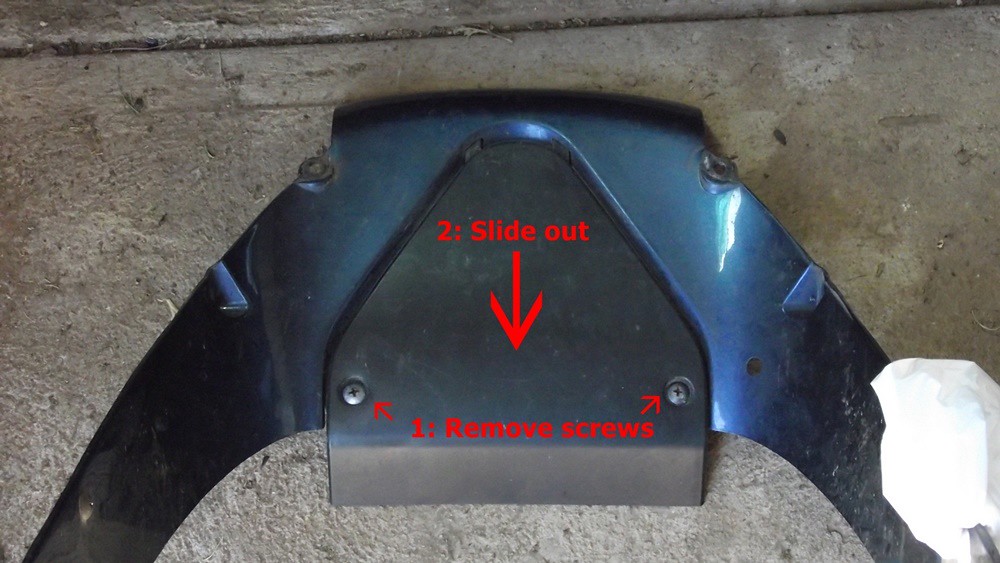
The manual tells me to remove the middle fairing inner panel to gain access underneath the headlight but I think that's a little over kill as there is a black panel underneath the headlight which is all I remove as shown in the picture.
You just need to be wary of the clips for the screws on the inner panel that might fall off and might need a slight squeeze to hold them in place before you replace the black panel

The next steps are all done by feel only and the more you do it, the quicker you'll do it. It took me ages the first time I did it and now I'm down to about 30 minutes max for two globe changes.
1: Next up is to remove the leads from the globes, they should just pull off (well mine do)
2: Remove the rubber boot. There's a tab which should be at the bottom so you can pull the boot off.

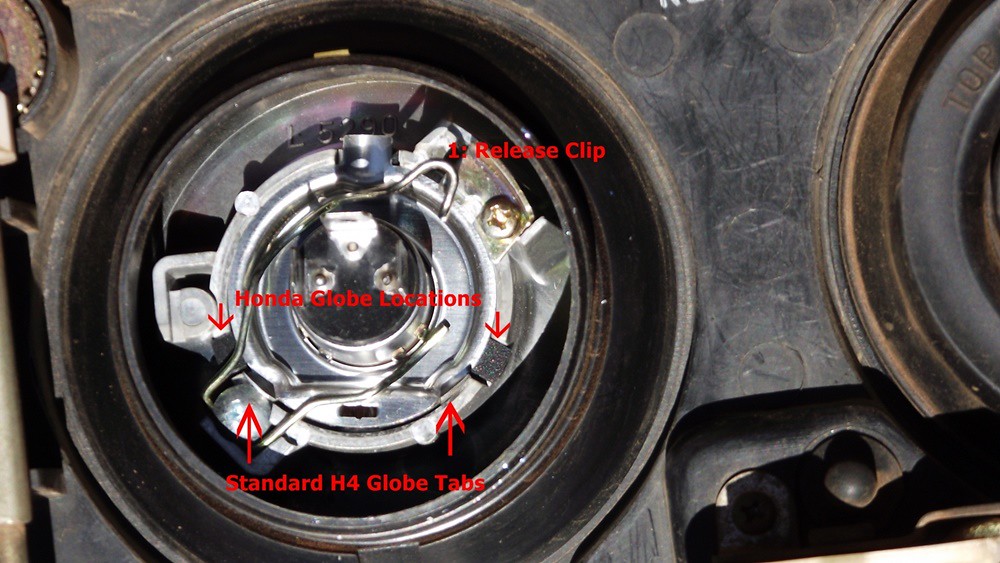
3: The tricky part is to release the globe retaining clip which is done by pushing in towards the globe then to the left until the clip releases.
4: Old globe/s out.
5: New Globes: what type do you have?
The standard 55/60W H4 that you get the from auto shop or Mr Honda's own H4 standard.
If you just happen to be well off and can afford Mr Honda's globes then it's just a simple matter of fitting the new globe/s (don't touch glass) and reversing the above process.
Otherwise you have two options.
1: Bend the lower two location tabs on the new globe and then insert new globe into Headlight and then reverse the removal process.
2: Similar to number one but install shims on the globes which use the original Honda locations and the globe is located correctly.
I have the shims on mine which can just be seen in the OEM globe location points, You can also see where the lower tabs on the globe have been bent.

When replacing the globe the wider tab on the globe goes to the top. If you place your pointer finger behind the tab you can feel the location point and the globe should sit it. to check I just try and turn the globe and if it's in the correct location in won't move. The globe should sit and won't fall out but I still hold the globe and use my thumb to get the retaining clip and swing it over until I can use my finger to replace the clip to hold the globe in.
6: Replace the rubber boots making sure the tabs are at the bottom.
7: Make sure that you can feel all three pins on the globes and attach the leads. It's easy to get this wrong so just make sure your lights are working correctly before you replace the black panel.